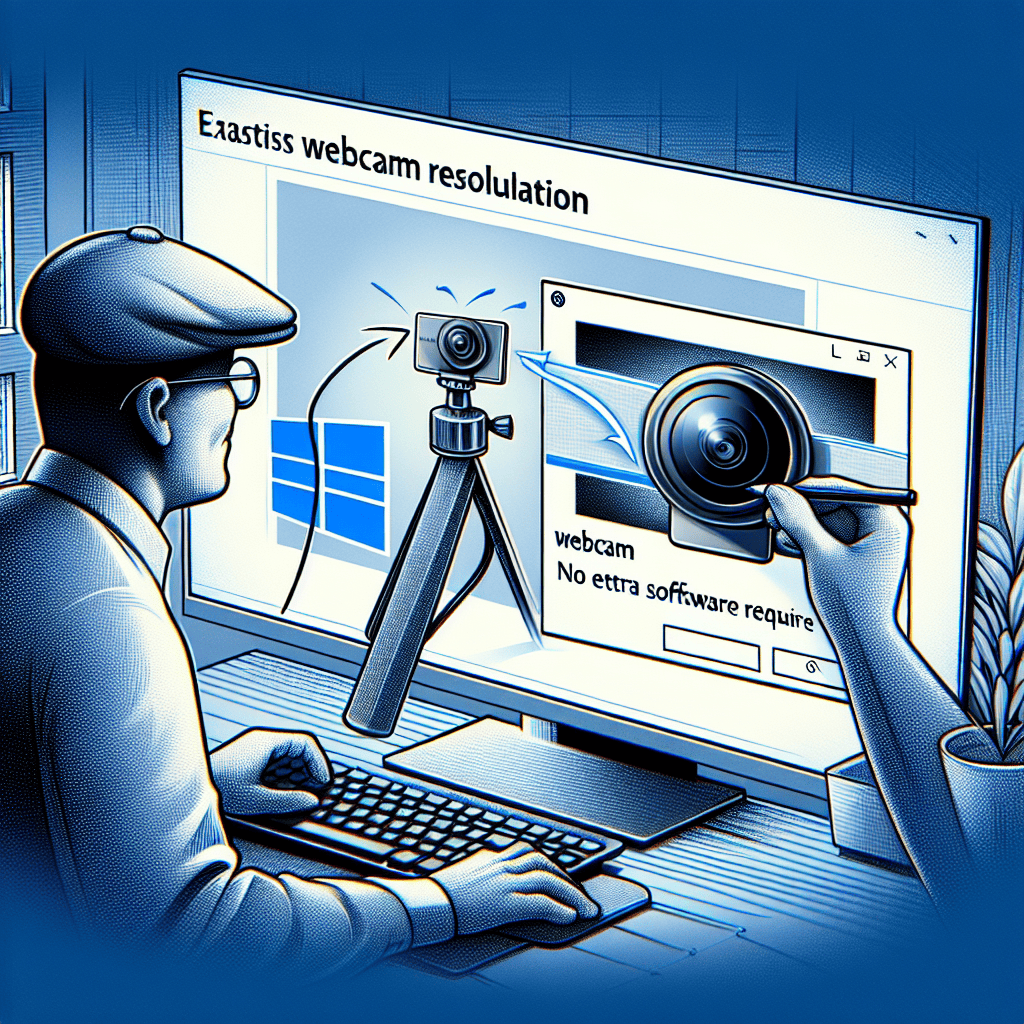
Effortless Webcam Resolution Adjustments in Windows 11: No Extra Software Required
In the age of remote work and virtual communication, having a clear and high-quality webcam feed is essential. Windows 11 offers users the ability to easily adjust webcam resolution settings without the need for additional software. This built-in functionality allows for seamless customization of video quality, ensuring that users can optimize their webcam performance for various applications, whether for professional meetings, online classes, or casual video chats. With a user-friendly interface and straightforward steps, Windows 11 empowers users to enhance their video experience effortlessly, making it a valuable feature for anyone relying on webcam technology.
Simple Steps to Adjust Webcam Resolution in Windows 11
In the digital age, the importance of high-quality video communication cannot be overstated, especially as remote work and virtual meetings have become commonplace. Windows 11 offers users a straightforward way to adjust webcam resolution without the need for additional software, making it easier than ever to enhance video quality. By following a few simple steps, users can ensure that their webcam settings are optimized for clarity and performance.
To begin, it is essential to access the settings menu on your Windows 11 device. This can be accomplished by clicking on the Start button located in the taskbar, followed by selecting the gear icon that represents the Settings application. Once in the Settings menu, users should navigate to the “System” section, which houses various options related to display, sound, and notifications. From there, it is crucial to select the “Camera” option, which will direct you to the settings specifically related to your webcam.
Upon entering the Camera settings, users will find a range of options that allow for customization of their webcam experience. One of the first things to look for is the “Camera Privacy” section, where users can ensure that their webcam is enabled and accessible for applications. This step is vital, as it ensures that any adjustments made will be effective during video calls or recordings. After confirming that the camera is enabled, users can proceed to adjust the resolution settings.
To adjust the webcam resolution, users should look for the “Video Quality” or “Resolution” settings within the Camera menu. Depending on the specific webcam and drivers installed, options may vary, but typically, users will see a dropdown menu or slider that allows them to select their desired resolution. Common resolutions include 720p, 1080p, and sometimes even higher options, depending on the capabilities of the webcam. It is advisable to choose a resolution that balances quality and performance, as higher resolutions may require more bandwidth and processing power.
Once the desired resolution is selected, it is important to test the changes to ensure that the adjustments have been applied correctly. Users can do this by launching a video conferencing application, such as Microsoft Teams or Zoom, and initiating a test call. During the call, it is beneficial to check the video quality and make any necessary adjustments based on the feedback received. If the video appears grainy or pixelated, users may want to lower the resolution slightly to improve performance, especially if they are experiencing lag or connectivity issues.
In addition to adjusting the resolution, users should also consider the lighting and background when using their webcam. Proper lighting can significantly enhance video quality, making it essential to position oneself in a well-lit area. Furthermore, a clean and uncluttered background can help maintain focus on the speaker, thereby improving the overall viewing experience for participants in a video call.
In conclusion, adjusting webcam resolution in Windows 11 is a simple yet effective way to enhance video quality without the need for additional software. By following the outlined steps, users can easily navigate the settings menu, select their preferred resolution, and test the changes to ensure optimal performance. With these adjustments, individuals can present themselves more professionally during virtual meetings, ultimately leading to more effective communication and collaboration in today’s digital landscape.
How to Access Webcam Settings in Windows 11
Accessing webcam settings in Windows 11 is a straightforward process that allows users to optimize their video quality without the need for additional software. This feature is particularly beneficial for those who frequently engage in video conferencing, streaming, or content creation. To begin, users should navigate to the Settings application, which serves as the central hub for system configurations. This can be accomplished by clicking on the Start menu, represented by the Windows icon located in the taskbar, and selecting the gear icon that signifies Settings.
Once in the Settings menu, users will find a variety of options categorized for ease of navigation. To access the webcam settings specifically, one should select the “Devices” option. This section encompasses all connected devices, including printers, Bluetooth devices, and, importantly, cameras. By clicking on “Devices,” users can then choose “Cameras” from the list on the left side of the window. This action will display all available cameras connected to the system, including built-in webcams and external USB cameras.
After selecting the desired camera, users will be presented with a range of options that allow for adjustments to the webcam settings. Here, one can modify various parameters such as brightness, contrast, and resolution. These adjustments are crucial for ensuring that the video feed is clear and visually appealing. For instance, increasing the brightness can enhance visibility in poorly lit environments, while adjusting the contrast can help in distinguishing between different colors and shades, thereby improving overall image quality.
In addition to basic adjustments, Windows 11 also provides users with the ability to test their webcam directly within the settings. This feature is particularly useful for ensuring that all adjustments have been applied correctly and that the camera is functioning as intended. By clicking on the “Test” button, users can view a live feed from their webcam, allowing them to make real-time adjustments and see the effects immediately. This interactive approach not only simplifies the process of fine-tuning settings but also instills confidence in users regarding their video quality before entering a meeting or starting a stream.
Furthermore, Windows 11 integrates seamlessly with various applications that utilize the webcam, such as Microsoft Teams, Zoom, and Skype. This compatibility means that any adjustments made within the camera settings will be reflected across these platforms, ensuring a consistent experience. Users can rest assured that their video quality will meet professional standards, enhancing their communication and presentation capabilities.
Moreover, it is worth noting that Windows 11 also includes privacy settings that allow users to control which applications have access to their webcam. This feature is essential for maintaining security and ensuring that the camera is only active when desired. By navigating to the Privacy section within the Settings menu, users can manage permissions for individual applications, providing an added layer of control over their webcam usage.
In conclusion, accessing and adjusting webcam settings in Windows 11 is a simple yet effective way to enhance video quality without the need for additional software. By following a few straightforward steps within the Settings application, users can optimize their webcam performance, ensuring that they present themselves in the best possible light during virtual interactions. This ease of access and control underscores Windows 11’s commitment to providing a user-friendly experience while prioritizing functionality and security.
Optimizing Webcam Quality Without Additional Software

In the digital age, where virtual communication has become a cornerstone of both personal and professional interactions, the quality of webcam video is paramount. Windows 11 offers users a seamless way to optimize webcam quality without the need for additional software, making it easier than ever to enhance video clarity and overall performance. By leveraging built-in settings and features, users can achieve significant improvements in their webcam output, ensuring that they present themselves in the best possible light during video calls, conferences, or streaming sessions.
To begin with, accessing the webcam settings in Windows 11 is a straightforward process. Users can navigate to the Settings app by clicking on the Start menu and selecting the gear icon. Once in the Settings menu, they should proceed to the “Devices” section, where they will find the “Cameras” option. This area provides a comprehensive overview of all connected cameras, allowing users to select their preferred webcam for adjustments. By clicking on the desired camera, users can access various settings that can be fine-tuned to enhance video quality.
One of the first adjustments to consider is the resolution setting. Windows 11 typically allows users to select from multiple resolution options, ranging from standard definitions to high-definition formats. By choosing a higher resolution, users can significantly improve the clarity of their video feed. However, it is essential to balance resolution with the capabilities of the internet connection and the hardware being used. A higher resolution may require more bandwidth, which could lead to lag or buffering during video calls. Therefore, users should test different settings to find the optimal balance that works for their specific situation.
In addition to resolution, adjusting the brightness and contrast settings can also have a profound impact on webcam quality. Windows 11 provides sliders for these parameters, enabling users to enhance their video feed based on their lighting conditions. For instance, in a dimly lit room, increasing the brightness can help illuminate the subject, while adjusting the contrast can add depth to the image. It is advisable to experiment with these settings to achieve a natural and flattering appearance on camera.
Furthermore, users should not overlook the importance of background settings. Windows 11 includes features that allow users to blur or change their background during video calls. This not only helps to maintain privacy but also directs focus to the subject, enhancing the overall viewing experience. By utilizing these background options, users can create a more professional and polished appearance, which is particularly beneficial in business settings.
Moreover, ensuring that the webcam lens is clean and unobstructed is a simple yet effective way to improve video quality. Dust or smudges on the lens can significantly degrade image clarity, so regular maintenance is essential. Users should take a moment to inspect their webcam and clean it gently with a microfiber cloth to remove any obstructions.
In conclusion, optimizing webcam quality in Windows 11 is an accessible process that requires no additional software. By adjusting resolution, brightness, contrast, and background settings, users can significantly enhance their video output. Additionally, maintaining the physical condition of the webcam itself plays a crucial role in achieving optimal performance. With these straightforward adjustments, users can ensure that they present themselves effectively in any virtual setting, enhancing both personal and professional interactions.
Troubleshooting Common Webcam Resolution Issues in Windows 11
In the realm of digital communication, the quality of video feeds has become increasingly important, particularly as remote work and virtual interactions have surged in popularity. However, users of Windows 11 may occasionally encounter issues with webcam resolution that can hinder their experience. Fortunately, troubleshooting these common problems does not require any additional software, as Windows 11 offers built-in tools and settings that can help users achieve optimal webcam performance.
To begin with, it is essential to ensure that the webcam is properly connected to the computer. A loose or faulty connection can lead to subpar video quality. Therefore, checking the physical connection of the webcam is a prudent first step. If the webcam is external, users should unplug it and then reconnect it to a different USB port to rule out any port-specific issues. For integrated webcams, ensuring that the device is enabled in the system settings is crucial. Users can navigate to the Device Manager by right-clicking the Start button and selecting it from the menu. Once in Device Manager, expanding the “Imaging devices” section will reveal the webcam, allowing users to check its status and ensure it is functioning correctly.
Once the physical connection has been verified, the next step involves adjusting the webcam settings within Windows 11. Users can access the camera settings by searching for “Camera” in the Start menu. This will lead to the Camera app, where users can preview their webcam feed. Within this interface, there are options to adjust various settings, including resolution. If the webcam is not displaying at the desired resolution, users should look for any available settings that allow them to change the video quality. It is important to note that not all webcams support high resolutions, so users should consult the specifications of their device to understand its capabilities.
In addition to adjusting settings within the Camera app, users may also want to explore the privacy settings related to the webcam. Windows 11 includes privacy controls that can restrict access to the camera for certain applications. By navigating to Settings, then Privacy & security, and selecting Camera, users can ensure that the necessary applications have permission to access the webcam. If an application is denied access, it may not be able to utilize the webcam at its full resolution, leading to potential quality issues.
Moreover, keeping the webcam drivers up to date is another critical aspect of maintaining optimal performance. Outdated drivers can lead to compatibility issues and reduced functionality. Users can return to Device Manager, right-click on the webcam, and select “Update driver” to check for any available updates. Windows will automatically search for the latest drivers and install them if found, which can resolve many common issues related to webcam performance.
Lastly, if users continue to experience resolution problems despite following these troubleshooting steps, it may be beneficial to test the webcam with different applications. Some software may have specific settings that override system defaults, affecting the resolution. By experimenting with various applications, users can determine whether the issue lies within a particular program or if it is a broader system problem.
In conclusion, troubleshooting webcam resolution issues in Windows 11 can be a straightforward process when users leverage the built-in tools and settings available to them. By ensuring proper connections, adjusting camera settings, managing privacy controls, updating drivers, and testing different applications, users can enhance their video quality without the need for additional software. This approach not only simplifies the troubleshooting process but also empowers users to take control of their digital communication experience.
Enhancing Video Calls: Webcam Resolution Tips for Windows 11
In the age of remote work and virtual communication, the quality of video calls has become increasingly important. With Windows 11, users have access to a range of built-in features that allow for effortless adjustments to webcam resolution, enhancing the overall experience without the need for additional software. Understanding how to optimize these settings can significantly improve the clarity and professionalism of your video calls.
To begin with, it is essential to recognize that the default webcam settings may not always provide the best quality for your specific needs. Windows 11 offers a straightforward way to access and modify these settings directly through the operating system. By navigating to the Settings menu, users can easily find the Camera settings under the Privacy & security section. This intuitive layout allows for quick adjustments, ensuring that users can focus on their communication rather than technical difficulties.
Once in the Camera settings, users will notice various options that can be tailored to enhance video quality. One of the most critical aspects to consider is the resolution. Higher resolutions, such as 1080p or even 4K, can provide a clearer image, making it easier for participants to see facial expressions and other non-verbal cues. However, it is important to balance resolution with bandwidth availability. A higher resolution may require more internet speed, which could lead to lag or interruptions if the connection is not robust enough. Therefore, assessing your internet capabilities before making adjustments is advisable.
In addition to resolution, lighting plays a crucial role in video quality. Windows 11 allows users to adjust brightness and contrast settings directly within the Camera settings. By optimizing these parameters, users can ensure that their image is well-lit and clear, even in less-than-ideal lighting conditions. For instance, if you find yourself in a dimly lit room, increasing the brightness can help illuminate your face, making you more visible to others on the call. Conversely, if the lighting is too harsh, adjusting the contrast can soften the image, creating a more flattering appearance.
Moreover, Windows 11 provides options for background effects that can further enhance the video call experience. Users can choose to blur their background or replace it with a virtual image, which can be particularly useful in professional settings. This feature not only minimizes distractions but also adds a layer of professionalism to your video presence. By utilizing these background options, users can maintain focus on the conversation while ensuring that their environment does not detract from their message.
Furthermore, it is beneficial to regularly check for updates to the webcam drivers. Windows 11 typically manages these updates automatically, but users can manually verify that they are using the latest drivers to ensure optimal performance. Updated drivers can improve compatibility with various applications and enhance overall video quality, making it a simple yet effective step in maintaining a high standard for video calls.
In conclusion, enhancing video calls through webcam resolution adjustments in Windows 11 is a straightforward process that requires no additional software. By exploring the built-in settings for resolution, lighting, and background effects, users can significantly improve their video quality. Regularly checking for driver updates further ensures that the webcam operates at its best. With these tips in mind, users can engage in more effective and professional video communication, ultimately leading to a more productive remote working experience.
Understanding Default Webcam Settings in Windows 11
In the realm of digital communication, the quality of video feeds has become increasingly important, particularly with the rise of remote work and virtual meetings. Windows 11, the latest operating system from Microsoft, offers users a streamlined approach to managing their webcam settings, allowing for effortless adjustments without the need for additional software. Understanding the default webcam settings in Windows 11 is essential for optimizing video quality and ensuring a seamless experience during video calls.
When a user connects a webcam to a Windows 11 device, the operating system automatically recognizes the hardware and configures it with default settings. These settings typically include resolution, frame rate, and brightness, which are crucial for delivering a clear and professional video feed. By default, Windows 11 aims to balance performance and quality, often selecting a resolution that is compatible with most applications. However, users may find that these default settings do not always meet their specific needs, especially in varying lighting conditions or when using different applications.
To access and modify these default webcam settings, users can navigate to the Settings app, which serves as the central hub for system configurations. Within the Settings menu, users can select the “Devices” option, followed by “Cameras.” This section provides a comprehensive overview of all connected webcams, allowing users to choose their preferred device. Once selected, users can delve into the properties of the webcam, where they will find options to adjust resolution and other parameters.
One of the most significant advantages of Windows 11 is its user-friendly interface, which simplifies the process of adjusting webcam settings. For instance, users can easily switch between different resolutions, such as 720p or 1080p, depending on their bandwidth and the requirements of the application they are using. Higher resolutions typically yield better image quality, but they also demand more from the system and internet connection. Therefore, understanding the trade-offs between resolution and performance is crucial for achieving optimal results.
Moreover, Windows 11 allows users to adjust additional settings such as brightness, contrast, and saturation directly within the camera properties. These adjustments can significantly enhance video quality, particularly in poorly lit environments. For example, increasing brightness can help illuminate a user’s face during a video call, making them more visible to others. Similarly, adjusting contrast can help in distinguishing facial features, which is particularly beneficial in professional settings where clarity is paramount.
In addition to these adjustments, Windows 11 also supports various applications that utilize the webcam, such as Microsoft Teams, Zoom, and Skype. Each of these applications may have its own settings that can further refine video quality. However, it is essential to note that the adjustments made in the Windows 11 settings will serve as the foundation for any application-specific configurations. Therefore, ensuring that the default webcam settings are optimized will enhance the overall experience across all platforms.
In conclusion, understanding the default webcam settings in Windows 11 is vital for users seeking to improve their video quality without the need for extra software. By leveraging the built-in features of the operating system, users can easily adjust resolution, brightness, and other parameters to suit their specific needs. This capability not only enhances the quality of video calls but also contributes to a more professional and engaging virtual presence. As remote communication continues to play a significant role in our daily lives, mastering these settings will undoubtedly prove beneficial.
Q&A
1. **Question:** How can I adjust webcam resolution in Windows 11 without extra software?
**Answer:** Go to Settings > System > Display, then scroll down to the “Advanced display settings” and select your webcam to adjust the resolution.
2. **Question:** Where can I find the webcam settings in Windows 11?
**Answer:** Open the Settings app, navigate to Devices > Cameras, and select your webcam to access its settings.
3. **Question:** Can I change the webcam resolution for specific applications in Windows 11?
**Answer:** Yes, some applications like Zoom or Microsoft Teams allow you to adjust the webcam resolution within their settings.
4. **Question:** Is there a way to improve webcam quality in Windows 11 without additional software?
**Answer:** You can improve quality by adjusting lighting conditions and using the built-in camera settings in the Camera app under Settings.
5. **Question:** How do I access the Camera app in Windows 11?
**Answer:** Click on the Start menu, type “Camera,” and select the Camera app from the search results.
6. **Question:** What should I do if my webcam resolution options are limited in Windows 11?
**Answer:** Ensure your webcam drivers are up to date by checking Device Manager and updating the driver if necessary.In conclusion, Windows 11 offers users the ability to effortlessly adjust webcam resolution settings without the need for additional software. This built-in functionality simplifies the process, allowing for quick and easy customization of video quality to suit various applications and preferences. By leveraging the native settings, users can enhance their video conferencing and streaming experiences with minimal hassle.